
Hey, ever stared at a blank wall in your place and thought, "Man, I wish I could just dream up the perfect piece and boom - it’s there"?
Well guess what… we’re basically living in that sci-fi moment right now, and it’s honestly pretty wild.
I’ll be real with you: six months ago I was convinced AI art was some super-technical thing only for pros. My first try? I dropped $40 on a blurry abstract mess that looked like a toddler’s finger painting gone wrong. Total disaster. But that flop taught me more than any tutorial ever could.
Fast forward and my apartment actually looks good now - and the whole transformation cost me under $150 across several projects. If you’ve got imagination but zero drawing skills (hi, same), a tight budget, or you’re just sick of the same generic prints everywhere, stick around. This is for you.
Why AI Became My Secret Weapon for Home Decor
Okay, I get the eye-rolls - AI art can feel cold or creepy sometimes. But when you treat it like a super-smart sketchbook instead of a magic wand, the results can be seriously cool.
Here’s what hooked me:
- You can test ideas without wasting money (no more buying something, hating how it looks in your space, and hiding it forever).
- Creative blocks? Smash ’em. I spent weeks hunting for "edgy botanical vibes" online—nothing. AI gave me solid options in 20 minutes.
- Perfect colour matching. That exact dusty rose shade in your curtains? AI will nail it if you describe it properly.
- And the best part? Friends keep asking where I bought my pieces… and their faces when I say "I made it with AI" is priceless.
Here are the only three tools you actually need to start (I’ve tested way too many, so you don’t have to):
Midjourney – The realism king
Best for big, print-worthy pieces that look like real photos or pro art. There’s a learning curve, but damn, the detail is impressive. I use it for anything wall-sized. Cost: Free trial, then ~$10/month basic plan (prices change—check their site). My favourite starter prompt: "Modern botanical monstera leaves with gold art deco geometric accents, watercolour and ink style, white background, interior design mockup --ar 2:3" (That-- ar controls aspect ratio—super handy for matching frames!)
Here’s what that kind of prompt can give you in real life:


Canva’s AI Tools – The easy, no-stress option
If you’ve ever made a meme or birthday invite, you’re set. Great for patterns, text art, pillows—anything quick. Free tier is honestly plenty for beginners.
Bing Image Creator – Free powerhouse
Runs on DALL-E 3 tech, zero cost with a Microsoft account. Perfect for blasting out 12 ideas in 10 minutes when you’re brainstorming.
My 5-Step Workflow That Actually Gets Results
Step 1: Discover Your Decor DNA
Spend 30 mins on Pinterest or Insta saving whatever stops your scroll. Then boil your vibe down to three words. Mine? Moody botanical minimalist. My friend Sarah went "vibrant retro modern" and turned her home office around in two weekends for about $45 (8 coordinated pieces!).
Pro tip: Snap a pic of your couch/rug → upload to coolors.co → get exact hex codes for perfect matching.
Step 2: Learn to Talk to AI (Prompts That Don’t Suck)
My first prompt was "pretty plant art." Results were… predictable. Good formula: [Style] + [Subject] + [Details] + [Medium] Example: "Minimalist line art eucalyptus branches with subtle gold foil accents, ink illustration, vertical format, cream background"
Step 3: Generate Like Crazy
Make 4–8 versions every time. Save everything. Sometimes the random early one ends up being the winner.
Step 4: Pixels → Real Life (Cheaply)
- Local print shops (in Surat: Printvenue, Vistaprint, or nearby spots) — I got 24×36" for ₹1500-ish (~$18)
- Redbubble/Society6 for pillows & stuff
- DIY iron-on transfers or Mod Podge hacks
- Always check DPI (300 is sharp, 150 minimum) or it’ll look pixelated when printed big.
Step 5: Style It Like You Actually Care
Rule of three: different sizes + textures + orientations = looks curated, not lazy. Mix your AI stuff with thrifted finds and plants. No one can tell what’s $8 and what’s custom.
Here’s a gallery wall vibe that feels super cohesive and lived-in:

And Sarah’s retro sunburst office setup? This energy:

Quick Project Ideas to Try This Weekend
- 15-Minute Accent Pillow (easiest win) Simple pattern in Canva → transfer paper or Spoonflower. Mine cost $12, and everyone compliments it.
Here’s that cozy pillow look:

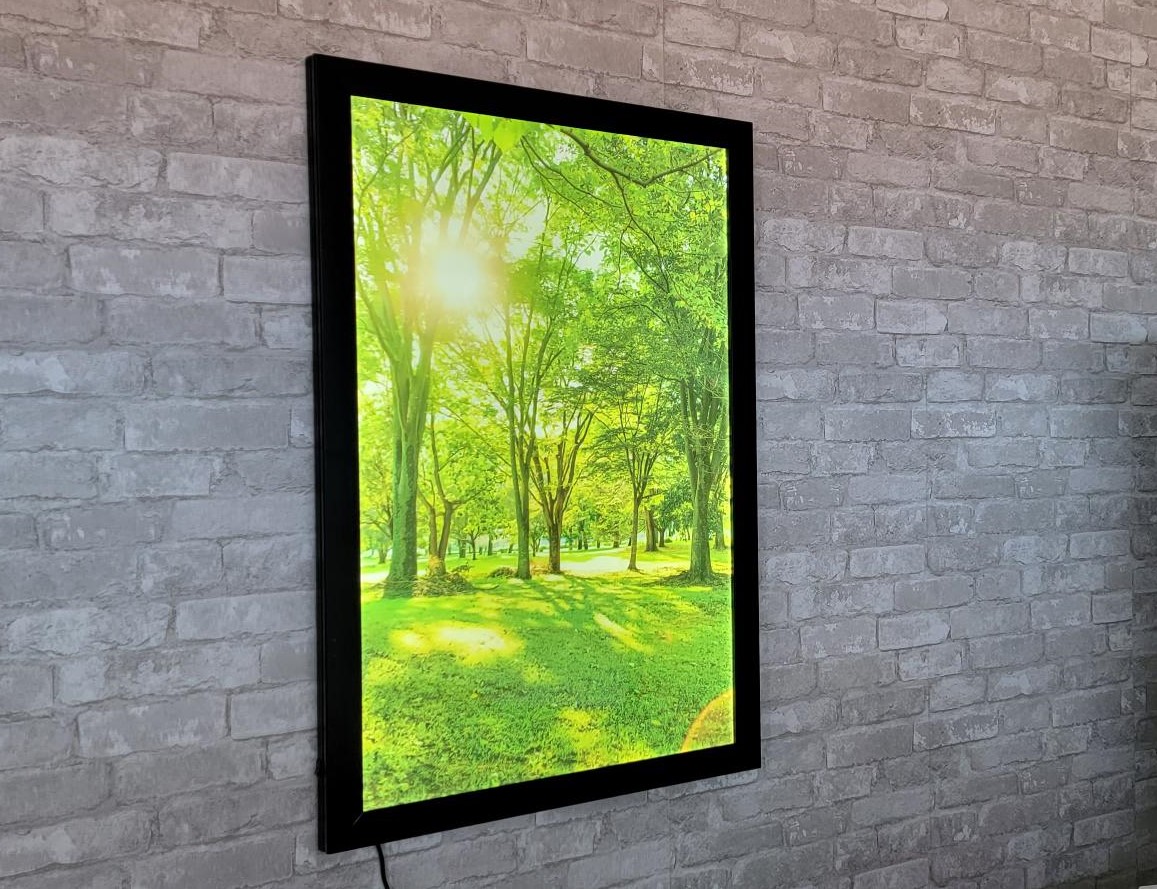
- Fake Window Illusion (advanced but mind-blowing for windowless rooms) Big landscape print + LED strips behind = instant view.
Something like this can totally change a dark space:
Mistakes I Made (So You Can Skip Them)
Overly long prompts, wrong aspect ratios, ignoring room lighting, forgetting to save good prompts… yeah, I did them all. Learn from my pain.
The Important Stuff (Ethics & Rights – Quick Version)
Commercial rights change, so always double-check official terms:
- Midjourney paid plans → generally okay for commercial use (Pro/Mega if your business makes big bucks)
- Canva → you own outputs, but pure AI might not get full copyright protection everywhere
- Bing → mostly personal use
Quick advice: Always tweak your pieces (change colours, combine elements) to make them yours. Don’t copy famous art. Be respectful with cultural motifs. And if someone asks? Just say “I designed it with AI tools” — no apology needed. You still made the vision happen.
Your First Week Challenge
Days 1–2: Generate 3 concepts for one wall. Day 3–4: Pick one → print it cheap. Days 5–7: Hang it, style it, snap a pic. Feel proud.
The worst case? You waste an hour and learn something. Best case? Your blank wall becomes your art.
My bathroom went from boring rental beige to my favourite spot for $23 and one Saturday. Still feels amazing every time I walk in.
You’ve got this. Grab your phone or laptop, mess around for an hour, and see what happens. What room are you starting with? Drop a comment—I’m dying to see what you create!
Written by Hardik - DIY lover from Surat, Gujarat, just a guy who got obsessed with making his rental feel like home using AI since 2024.

